| |
Chapter 6: Water
6.1. Preface
With the short description of plant physiology, we already looked into the function of water in plants. Water has three functions: it is a building material (together with CO2 and light energy, glucose is produced), it makes the plant sturdy (the plant cells fill themselves with water, giving the plant a firm structure), and it transports nutrients throughout the plant. Water is indispensable for the existence of plants. Remember that the law of minimums plays a crucial role here also: too little water, but sufficient light, CO2, and nutrients, produces unfit plants. Too much water, with respect to the other criteria, produces just as poor results. Therefore it's important to find an optimal balance, so the plants will flourish.
6.2. Water quality
It probably goes without saying, but the water you use must be as clean as possible. For plants, however, 'clean' is a relative concept. Nutrients such as nitrogen, phosphate, potassium, etc. are always dissolved in water used for plant food. In any case, the concentrations the plants need of these materials make the water undrinkable for humans. In contrast to 100% distilled water, 'pollutants' are found in ordinary tap water. You can request a chart with data about the quality from the company that produces your drinking water. The hardness in degrees - the GH (German Hardness) - is also given. This is a measure for the amount of calcium in the water. Below, you have an example of this kind of water chart. Some of the 'pollutants' aren't 'pollutants' to plants, but actually fertilizing materials. To determine the water quality (and the plant foods you add), you need two types of meters. The first is an EC meter. 'EC' is the abbreviation for 'Electrical Conductivity'. Pure water, also called demineralized water, does not conduct electricity. When we add fertilizer to the water, or the water is 'polluted' in some other way, the water will indeed conduct electricity. Fortunately, home growers can make use of this property of water. With the EC meter, we can determine whether or not the concentration of nutrients in the water will provide for optimum plant growth. A high EC value means a high concentration of fertilizing materials, and a low EC value, a low concentration. Too high a concentration shows that you're over-fertilizing. As a result, your plants will dry out and burn. (By osmotic processes, water is drawn out of the plant; the leaves curl upwards or downwards.) The fertilizer concentration must be lowered by further diluting with water. Too low an EC value means a shortage of fertilizer. This decreases the growth on rockwool substrate. The EC value is given in millisiemens. 1.8 millisiemens is the optimal value for growing cannabis. The second type of meter is the pH meter. With a pH meter, you can determine the acidity of water. Most of us have measured the acidity of a solution at one time or another in high school. We did it with a litmus test. But the litmus test is not suitable for measuring acidity when growing hemp at home. The accuracy of this test leaves something to be desired. Actually, we can only estimate the pH value, to the accuracy of one pH point. We need greater accuracy for cultivating cannabis. The average pH meter used by aquarium owners is relatively cheap, and meets the requirements well. Generally, they're up to 0.02 pH points accurate. The ability to absorb nutrients depends on the acidity of the water. If the pH is too high or too low, the plants can't absorb some nutrients properly. Then deficiency disease occurs . The pH scale goes from 1 to 14. A solution with a pH between 1 and 7 is called 'acid', a pH of 7 is called neutral, and between 7 and 14, 'basic'. The lower the pH, the more acidic the solution (in our case: water). On the next page, you have a chart showing which nutrients plants can absorb best at each pH. You can read from the chart that cannabis plants like it if they receive water which is slightly acidic. The home grower must make sure that the pH of the water being used is approximately 5.8. The EC meter, as well as the pH meter, must be adjusted now and then. Special calibrating fluids are available for this operation. The temperature is also an important factor when calibrating an EC meter. The correct temperature is listed on the package of calibrating fluid. A pH meter has two set screws, and it must be adjusted to two values. The probe of the pH meter is first dipped into a calibrating fluid with a pH value of 7.0. Then, this value is set using one of the set screws. After that, the probe must be cleaned well, otherwise deviations will occur with the second calibration. Next, the probe is dipped in a calibrating fluid with a pH value of 4.0, and this value is set using the other set screw. It's important that the pH meter probe is kept moist. Depending on the type of pH meter, it may be stored in ordinary tap water, or in a special fluid supplied by the manufacturer. In the story about the EC meter, we've already indicated that the temperature of the nutrient solution influences plant growth. Cannabis grows best with a water temperature of 25 degrees Celsius. Below this temperature, the roots of the plant have more trouble taking up water and nutrients. Too high a temperature is not good either. That will kill the plants Tap water must be warmed up to 25 degrees C. Use a water thermometer to keep an eye on the water temperature. Warming the water is easy with the installation of a heating element in the nutrient tank. This equipment also comes from the aquarium world. Quality heating elements with thermostats are available for aquariums. For a 100 liter nutrient tank, you need a 100 Watt heating element; with a 200 liter tank, we recommend a 250 Watt element. Make sure the heating element is always kept under water; otherwise it will be destroyed. This means that you must never pump all the water out of the nutrient tank to the plants. When you want to take the heating element out of the water, always disconnect it first. Then, let it cool off for at least 15 minutes. Only then can you carefully take it out of the water. Any other way, you run the risk the element will crack. To prevent algae growth in the nutrient tank, it's important to add air to the water. We do that by means of an aquarium pump with an aerator attached. The aerator is connected to the pump, and placed at the bottom of the nutrient tank. The water in the tank becomes rich in oxygen by aeration, and is also kept in motion. This way, algae have much less chance to proliferate. 6.3. The irrigation system
We do everything we can to promote plant growth. We provide optimal lighting and sufficient CO2. As a third component, regular irrigation is an essential link. This way the plants receive their water and nutrients in time. The easiest way is to water by hand several times a day. But, in the first place, that involves carrying a lot of watering cans around, in which you've dissolved the correct amount of fertilizer every time. In the second place, watering by hand requires enormous discipline. Giving water regularly on time will quickly 'water' YOU down You can't skip a few days here and there, and leave your plants to themselves. Finding a babysitter for cannabis plants is often more difficult than finding a babysitter for your kids . . . So, we prefer to give water regularly with an irrigation system controlled by a timer clock. This way, we can rest assured the plants get their wet and dry periods on time. In Chapter 3, we've given a lot of attention to the installation of an irrigation system. Now, we'll go a little deeper. In its simplest form, an irrigation system consists of an immersible pump, controlled by a timer clock, which has hoses with sprinklers attached to it. The sump pump is placed in a nutrient tank with a capacity large enough to make refilling necessary only two times per week. We're talking about a tank with a contents of at least 25 liters per square meter of garden space. 5 to 7 liters of water with nutrients are used every day for each square meter. So, refilling the tank every 3 or 4 days is enough. Remember, there must always be enough water in the tank to cover the heating element and the pump. Both instruments will be ruined if they are left without water. Preferably, the nutrient tank should sit on the floor. There are two important reasons for this. In the first place, it saves space. The tank can also be underneath the tables. In the second place, it prevents the natural working regarding water levels between communicating vessels. If the nutrient tank is placed too high, the water will flow through the hose without the aid of a pump. This goes on until the water level in the tank reaches the same level as the lowest point of the connected irrigation hose. Solutions can be devised for the problem of 'communicating' vessels, - coupling an electric faucet between the nutrient tank and the irrigation hose, for example. This solution is unnecessarily expensive. The problem of communicating vessels can be prevented by placing a sprinkler outlet on the top of the hose. The sump pump must be powerful enough to send water to all the sprinklers that will be installed. For a garden 2 to 10 m2 in size an immersible pump with performance capability of 7 meters is enough, if used with a 1-inch irrigation hose. Also, the pressure of the pump should not be too high, otherwise the sprinklers (also called capillaries) won't drip, but spray. Most sprinklers function at a pressure from 0.5 bar on up. To the immersible pump, we connect an irrigation hose (polyethylene or PE- hose). The irrigation hose goes through the middle of the grow trays. Then we make holes in the polyethylene hose and insert the sprinklers. We install one sprinkler for every plant. We have to prevent dirt and other materials from clogging up the narrow openings of the sprinklers. We take two measures: first, we keep a lid on the nutrienttank so nothing undesirable falls in the water. Second, we place a filter between the pump and the irrigation hose. In an ideal situation, plants should get water and nutrients spread evenly throughout the day. We can arrange for this by connecting a timer clock to the irrigation system. A suitable timer clock must also have a minute setting, and must be able to switch on and off at least 6 times a day. Modern timer clocks are digital. These clocks have a memory to store the desired times. If the electricity goes off, batteries usually supply current to preserve the memory. The disadvantage is that batteries run down. If the battery is dead, and the electricity goes off, the memory is erased. The steady watering stops, and the garden is damaged. The recommended choice is a timer clock with a good car battery for backup. Now, our irrigation system ensures that the plants get the correct amount of water and fertilizer on time. The sprinklers evenly distribute the nutrient solution. We prefer growing in 'libra trays'; - so-called 'growing trays' which have been especially designed for growing on rockwool slabs. There are other methods, of course. You can also lay rockwool slabs on corrugated roofing sheets, for example. This does give problems with drainage water . It's more hygienic, and more practical to work with growing trays. They're not expensive, and it's simple to connect a drainage system to them. Easier still is snapping drainage spouts onto the growing trays. Then the water can be drained into a gutter. We divide the irrigation of the plants into 6 periods during the 18-hour light cycle. The first feeding takes place when the lights are switched on. A feeding session follows every 3 hours, until 3 hours before the lights go off again (the plants can take in nutrients only during the light period!). In the beginning, we don't let the irrigations periods last more than one minute, because otherwise, problems with root development can occur. We stick to short feeding periods. Throughout the entire vegetative phase. During the generative phase (12-hour light cycle), we also divide the 6 feeding sessions so the plants will get water every two hours. Since the plants have grown a little by then, and they need more water, we let the irrigation periods last for two minutes. When irrigating the plants, you must make sure the nutrient solutions soaks through thoroughly. Thorough watering means that about one-third of the water applied drains off. Thorough watering is important to prevent the accumulation of the nutrient salts in the rockwool slabs. If watering is not sufficiently thorough, it's sensible to raise the number of irrigation sessions. Finally, another word about safety. Everyone knows that water and electricity are equally related as water and fire. The sump pump, as well as the thermostatic heating element, work with use electric currency and under water. Use only equipment of wich you are sure it is well-insulated. Moreover, it's sensible to disconnect the plugs before you put your hands in the nutrient tank. This can save you from a possibly shocking experience.
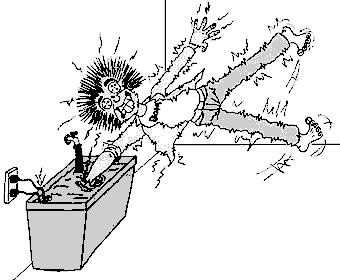
 A shocking experience. A shocking experience.
|
|